

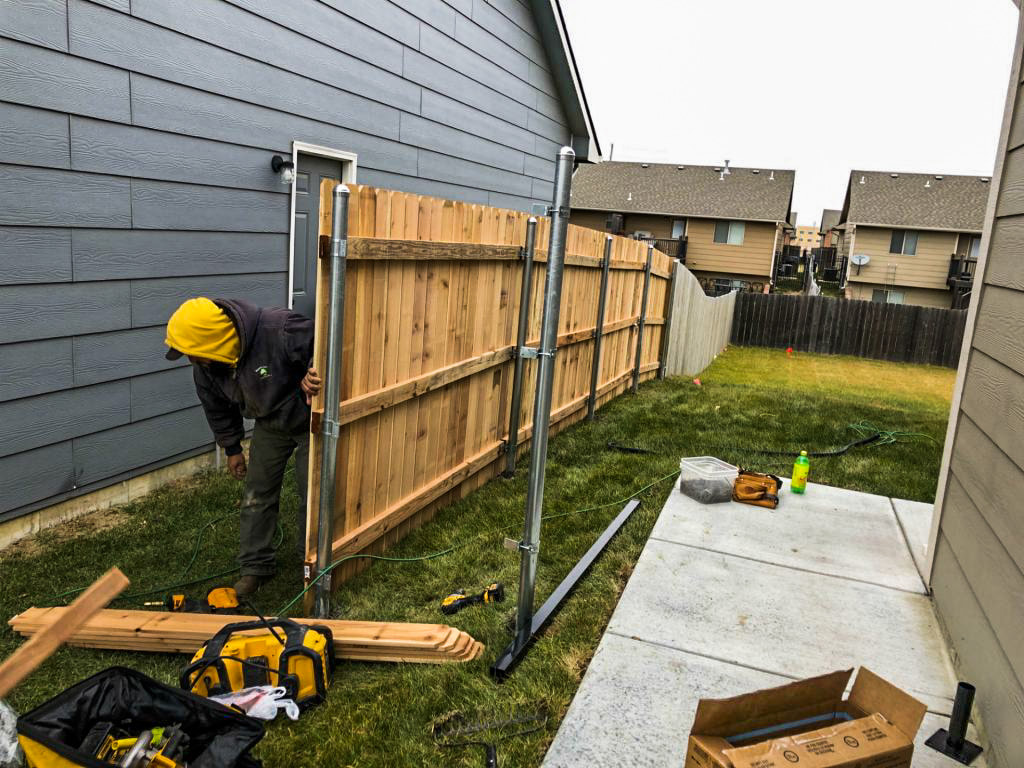
Understanding the Fundamentals of Fence Installation
Choosing the Right Materials for Your Fence
Choosing the right materials for your fence is paramount to achieving a durable and attractive barrier that meets your needs. There are a variety of materials available, each with distinct qualities, benefits, and drawbacks. The most popular materials include wood, vinyl, metal, and composite options. Wood is a classic choice that provides a natural aesthetic and versatility in design. Cedar, pine, and redwood are commonly used types, each displaying varying characteristics such as resistance to pests and rot. However, wood requires regular maintenance to preserve its integrity and appearance.
Vinyl fencing offers a low-maintenance alternative that resists fading, scratching, and warping. It’s available in numerous styles and colors and can mimic the appearance of wood without the drawbacks. Metal options, such as aluminum or wrought iron, offer strength and durability but can be more expensive. They often require the addition of protective coatings to prevent rust and corrosion, especially in damp climates. Finally, composite materials, which blend wood fibers and plastic, provide an eco-friendly choice that requires minimal maintenance while delivering the look of traditional wood. When selecting a material, consider factors such as climate, budget, desired aesthetics, and the level of maintenance you’re willing to undertake. When the time comes to install your fence, you can always consult reputable composite fence contractors (or whichever material is preferred) for expert advice and assistance. They can help ensure that the fence is durable and ensure a smooth, professional installation.
Tools You Can’t Live Without: The Essential Kit
Having the right tools on hand can mean the difference between a smooth fence installation process and a frustrating experience riddled with setbacks. An essential fencing tool kit should include: a post hole digger, level, measuring tape, handsaw or power saw, hammer, drill with appropriate bits for your chosen materials, and a mallet. A post hole digger is crucial for excavating deep holes for the fence posts, ensuring they are set firmly in the ground. A level is necessary to ensure that each post is vertically aligned for structural stability.
For precise measurements, a measuring tape is a must-have; this will aid in planning your fence layout accurately. If working with wood, a handsaw may suffice, but for tougher materials or to produce a smoother cut, a power saw will simplify the task. A quality hammer or drill will facilitate the fastening of panels and gates. Additionally, you should not overlook safety gear such as gloves, goggles, and ear protection. Investing in high-quality tools can improve your efficiency and ensure a more successful installation, making the initial expenditure worthwhile.
Reading Your Property Lines: Avoiding Common Pitfalls
Understanding your property lines is crucial for a successful fence installation project. Misjudging your property boundaries can lead to costly disputes with neighbors or even legal challenges. Start by consulting your property deed, which typically contains a detailed description of your plot’s dimensions and boundaries. Most importantly, consider hiring a licensed surveyor to confirm your property lines if you are uncertain. A surveyor will use professional tools to precisely determine the boundaries, marking them clearly and offering an authoritative perspective on your property.
Moreover, it’s vital to communicate with neighbors before commencing installation. A mutually agreed-upon fence placement can result in positive neighborly relations and can prevent future conflicts. Be aware of any existing easements that may be on your property, as these can restrict where you place your fence. Furthermore, local zoning laws may dictate specific regulations regarding fence placement, height, and materials in your area. Confirm these regulations to ensure compliance with local authorities, which can save you from future headaches and potential fines.
Planning Your Fence Layout: Precision is Key
How to Create a Detailed Fence Blueprint
The success of your fence installation largely hinges on meticulous planning, and starting with a detailed fence blueprint is essential. Your blueprint should incorporate accurate measurements of the area where the fence will be installed, including the existing features such as trees, gardens, and pathways that will influence the layout. Draw a scaled diagram of your yard and mark the desired fence line, taking into account any gates or access points required for maintenance.
When designing your blueprint, consider the height and style of the fence. Will it provide privacy, security, or simply act as an aesthetic barrier? These factors affect the materials and layout you’ll choose. Additionally, surveying your property will help you align your fence with natural landscape features, minimizing the need for significant alterations. By projecting the blueprint on paper or using digital tools, you can visualize the end product and make necessary adjustments beforehand, ensuring everything aligns with your initial vision.
Accounting for Terrain: Dips, Elevations, and Angles
The lay of the land can significantly impact the complexity of your fence installation. Analyzing the terrain includes understanding its contours, slopes, and any obstacles that might require special considerations. Installing a fence on uneven ground presents challenges, but with the right approach, it can yield stunning results. Adjust your fence design to accommodate dips and rises in your yard, using techniques such as stepping or following the contour of the ground. Stepping involves creating a series of small elevation changes that mirror the terrain, allowing for a consistent height adjustment rather than a lopsided appearance.
When working on hilly terrains, consider the potential for erosion or settling over time. Installing a reinforced fence or incorporating drainage solutions can help mitigate these issues. If your yard has significant slopes, a tiered approach may be necessary, creating separate sections that shift with the landscape. Alternatively, using gates and panels cut to shape can allow for a smoother transition across uneven ground, resulting in a visually appealing and functional fence. Planning for these geographical challenges in advance will streamline your installation process and enhance the final project.
Local Regulations: Navigating Permits and Restrictions
Before embarking on your fence installation journey, it’s vital to understand any local regulations that may apply to your project. These regulations can vary significantly depending on the country, state, and even municipality, so it’s crucial to conduct thorough research. Start by contacting your local planning or zoning office to inquire about fence height restrictions, materials, and required permits.
Many areas have regulations regarding how close a fence can be built to property lines or whether it can obstruct views in certain zones. Being aware of these rules can prevent unpleasant surprises and potential fines after installation. Moreover, some homeowners’ associations (HOAs) have specific guidelines that govern exterior home improvements, including fences. If your home falls under such jurisdiction, reviewing the community guidelines before beginning installation is essential for compliance.
The Art of Installation: Techniques for a Flawless Finish
Setting Posts Like a Pro: Digging and Alignment Tips
Properly setting your fence posts is one of the most critical aspects of the installation process. The stability and longevity of your fence depend heavily on how well the posts are anchored in the ground. Start by marking the locations of the posts according to your blueprint, ensuring that the distance between them adheres to the specifications required for your chosen fence panels. Using a post hole digger, excavate holes that are one-third deeper than the height of the fence to provide ample support. As a rule of thumb, a hole that’s about three times the width of the post is advisable, allowing for proper backfilling.
Once the holes are prepared, place the posts into the ground and use braces to hold them in an upright position. Employ a level to check for vertical alignment, ensuring that the posts are perfectly perpendicular to the ground. To secure the posts, fill the holes with gravel or concrete, depending on the desired level of permanence. If using concrete, allow adequate curing time to achieve maximum strength before attaching the fence panels. This step is crucial; otherwise, you risk misalignments that could undermine the entire fence’s structural integrity.
Securing Panels with Style: Fastening Methods Explored
After setting the posts, it’s time to attach the fence panels securely. The method of fastening will depend on the materials of your fence, as each comes with particular installation techniques. For wooden panels, using galvanized nails or screws is typical, providing a firm hold that combats rust. Ensure that the panels are level and evenly spaced as you attach them to the posts. Consider utilizing brackets for added security, especially on taller fences where additional strength is required.
For vinyl fencing, manufacturers often provide specialized brackets and clips that keep panels firmly attached while allowing for slight flexibility. When installing metal fencing, techniques may include welding or bolting the panels directly to the posts. Regardless of the method chosen, always prioritize aesthetics; aligning the panels and ensuring uniform spacing enhances the fence’s visual appeal. Once all panels are securely fastened, take special care to inspect for any inconsistencies in height or leveling that may detract from the overall presentation.
Finishing Touches: Painting, Staining, and Sealing
The finishing touches on your fence can dramatically elevate its appearance and longevity. If you opted for wood, painting or staining not only allows for personal expression but also protects the wood from environmental damage. Selecting the right stain is essential; transparent stains allow the natural grain to shine, while solid stains add a vibrant color while still showing some wood texture. Apply a weather-resistant sealant after staining to shield against moisture, UV rays, and other elements that can fade or damage the surface.
For vinyl fences, cleaning with a soft detergent and water solution is often sufficient, though specialized vinyl protectants are available to enhance shine and longevity. Metal fences benefit from a coat of paint or rust-preventative sealant to shield the material from corrosion, particularly in areas with high humidity. Ensure that all surfaces are prepped properly before painting or sealing — this means cleaning, sanding, and priming where necessary to achieve a flawless finish. By investing time and care in these final steps, you can ensure your fence remains visually appealing and functional for years to come.
Maintenance Matters: Keeping Your Fence in Prime Condition
Seasonal Care: Adapting to Weather Changes
The longevity of your fence is significantly influenced by how well it withstands seasonal weather changes. Each season brings unique challenges; thus, adapting your maintenance routine accordingly is imperative. In spring, perform a thorough inspection of your fence to check for any winter damage such as cracks, loose panels, or rust. Cleaning your fence at this time can help remove dirt build-up and prepare it for any required treatments.
Summer months are often ideal for painting or staining wooden fences, as it must remain dry and warm for effective application. Alongside this, ensure to check for any sagging sections and repair them before they worsen. In fall, trim back any vegetation that may have grown too close to the fence, as it can create damp conditions that encourage rot or rust. While winter may not necessitate as much action, it’s wise to regularly remove heavy snow accumulation from the fence lest it stress the structure and lead to potential damage.
Common Issues and Quick Fixes: A Troubleshooting Guide
Even the best-installed fences can suffer occasional problems. Recognizing these issues early and implementing solutions can save time and preserve the fence’s integrity. Common problems include sagging posts or panels, paint or stain peeling, rust on metal fences, and insect infestations in wooden structures. If you notice leaning or sagging on a post, it may be due to improper installation or ground settling; reinforcing the post or re-setting it deeper may be necessary.
For peeling paint or stain, consider scraping down the affected areas and applying a new coat, ensuring to select suitable weather-resistant products. Rust can typically be handled with a rust-removal product and protective paint, while insect attacks in wooden fences may require professional treatment if severe damage occurs. Performing routine checks and taking a proactive approach to maintenance can mitigate these issues and help extend the life of your fence significantly.
Extending Lifespan: Tips for Long-Lasting Durability
To ensure the long-lasting durability of your fence, several proactive steps can be taken beyond routine maintenance. Start with choosing high-quality materials resistant to the specific conditions of your environment, whether that is mold, pest infestations, or rust. Wood preservatives, sealants, and protective coatings can also help enhance your fence’s durability by warding off natural forces that contribute to deterioration.
Regular inspections play a crucial role in early detection of damage and can prevent deeper, more costly repairs in the future. Incorporating landscaping elements, such as planting bushes or shrubs at least a foot away from wooden fences, can help reduce moisture exposure from direct contact. Additionally, ensuring proper drainage around the fence line can prevent pooling water that can lead to soil erosion. In conclusion, a strategic approach to both installation and maintenance will yield a fence that not only looks great but stands robustly against the test of time.
FAQ
Question: What is the best time of year to install a fence? – The best time for fence installation generally tends to be in the spring or fall when temperatures are moderate and the ground is typically easier to work with. This helps avoid extreme weather conditions that can complicate the installation process.
Question: How can I determine the height of my fence? – The height of your fence should take into account your needs for privacy, security, and local regulations. Many municipalities have height restrictions, so it’s advisable to check with local zoning laws to comply with restrictions.
Question: What type of fence lasts the longest? – Metal fences, particularly those made of wrought iron or aluminum, tend to last the longest due to their durability and resistance to weather elements. With proper maintenance, they can last for decades without needing frequent repairs.
Question: Can I install a fence without a permit? – Whether you need a permit depends on local regulations. Many areas require permits for fence installation to ensure compliance with zoning laws, so it’s crucial to check with your local planning office before starting.
Question: How do I choose the right color for my fence? – When choosing a fence color, consider your home’s exterior color, the landscaping, and community aesthetics. Neutral colors often blend well, while bold colors can make a statement, but be mindful of any HOA guidelines.
Question: What is the typical lifespan of a wooden fence? – A well-maintained wooden fence typically lasts between 10 to 15 years. However, this can vary based on the type of wood used, the local climate, and the level of care provided throughout its life.
Question: How can I prevent my fence from leaning or sagging? – To prevent leaning or sagging, ensure that the posts are set firmly in the ground and are properly aligned during installation. Regular inspections and adjustments as necessary can also help maintain a straight and sturdy fence.
Question: Is it possible to install a fence on a slope? – Yes, fences can be installed on slopes. Techniques such as stepping or following the contour of the ground can help create a visually appealing and functional fence that accommodates the uneven terrain.
Useful Resources
- eXtension – Cooperative Extension System
- Houzz – Home Design Ideas
- Family Handyman – DIY Projects & Home Improvement
- DIY Network – Home Improvement & Garden
- International Society of Arboriculture – Tree Care
- HomeAdvisor – Find Local Home Professionals
- Michigan State University Extension – Gardening and Landscaping
- Old House Online – Historic Home Restoration and Preservation
